Hi all! Chelsea here from Lovely Indeed, happy to be joining the amazing DIY squad at Poppytalk! I'm a big fan of recycling and repurposing, so I decided to get to work on some cardboard boxes I had laying around the house. As it turns out, cardboard makes a pretty sweet little pendant light.
First, gather your materials.
- Corrugated cardboard, 25" wide and as tall as you'd like your light
- Spray paint
- Yard stick
- Box cutter
- Glue gun
- Pendant light cord (this one from Ikea is only $5!)
Step 1: Start by spray painting one side of the cardboard. Let it dry thoroughly and turn the cardboard painted side down.
Step
2: Mark the cardboard at 5-inch intervals lengthwise with the box
cutter. On each mark, make a vertical cut with the box cutter so that
the top side of the cardboard is cut but the bottom side remains intact.
Step 3: Lay the cardboard flat again and cut it into strips lengthwise by tracing along the yard stick with the box cutter.
Step
4: Once your strips are cut, hot glue the ends of each strip together
(painted side in) so that you have pentagons. Then begin making a
staggered stack with the pentagons and securing them in place with hot
glue.
Step
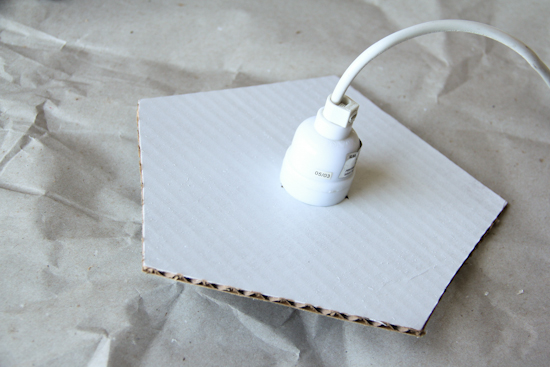
5: Finally, cut a solid pentagon out of cardboard for the top of the
pendant. Cut a hole in the top just wide enough to fit the light socket
snugly. Secure this to the top of the pendant with hot glue, and light
it up!
Not
sure yet where this little guy is going to live in my house, but I have
a feeling he'll brighten the perfect corner. Have fun!
Contributor Post by Chelsea of Lovely Indeed
Follow Chelsea at Lovely Indeed, Twitter, Facebook and Pinterest!
Follow Chelsea at Lovely Indeed, Twitter, Facebook and Pinterest!


23 comments:
genious! all these tops from the pizza boxes will find a a new way of living with this diy.
This is so cool! I wish I had my own place so I could make this!! Onto Pinterest it goes! :)
Katlyn
www.thedreamymeadow.com
This is brill. Thank you so much for sharing this, we're moving soon and this is definitely going on the decorating list.
great idea!
Love it, I'll definitely try this!
fantastic idea!!
Before continue reading, I think the material is from wood (because I don't read the tittle before), but I'm wrong...:D
What a beautiful Light...^^
Regards,
www.accdiy.com
Before continue reading, I think the material is from wood (because I don't read the tittle before), but I'm wrong...:D
What a beautiful Light...^^
Absolutely brillant !!
If you use hot glue, be sure not to use a bulb that gets hot! The heat form the bulb will reactivate the glue, causing the pieces to separate.
fantastic idea. whats that typo-thing in the background?
Hahahah what an AWESOME idea... I think this is going to have to be one I will try myself! ...and talk about being green AND budget friendly! Way to add "little luxury" to your life on a shoe string! :o)
Thanks for the idea!
Lovely idea, Chelsea - it looks so nice!
fire hazard factor?
Fantastic upcycling...looks great...but I was wondering the same thing...would it be a fire hazard??
I love this this is soo easy to make. No need to own or use a lazer cutter.
Cardboard is one of my favorite materials. Nicely done!
If you're worried about fire hazards and glue melting, don't panic. Get one of the high efficiency bulbs [they don't put out nearly as much heat] and if you're -still- worried, make the design bigger in order to give the bulb a little more berth. Typically you can have paper/cardboard/other flammables around a bulb so long as it's more than 2 inches away from it.
Love this project SO much! I even featured it on my Facebook! You have a new follower and admirer!
xo Sam
DIYhuntress.com
facebook.com/DIYhuntress
love it!!love it!!love it!!will dedicate a corner at my house for this buddy!
This is so cool! Great idea!! I'll try to make some...thanks!!
My wife have done this thanks to your instructions, see the result here:
http://www.lazyinvstor.com/2013/10/diy-lamp-unapologeticallly-cardboard.html
We have referenced your blog :)
I'm not sure, but....... isn't this something that wouldn't work if you rent an apartment? I don't own the house that I live in, so I don't think I am able to do this lovely DIY project! Any alternatives?
You could easily build this with the plastic bit in the top that screws on under the bulb (like most lamp shades fit on!)
Personally, I'm doing this twice for a pair of lamps that I currently DETEST! Been looking for a cheap way to change them for forever!
Post a Comment