
We're still loving the geometric shape for a holiday ornament and thought we'd try our hand at a metalworked version this year; hand stamping a customized message into each. We thought they would make for a cool personalized gift tag on a gift, a garland, or of course, to hang on a tree! We were thinking they would also make a nice dreidel ornament too. Here's how we made them.

Supplies Needed:
Metalworking Tool Set or a cutting mat, ruler, rotary cutter or scissors, an awl and an embossing mat
Metalworking Metallic Sheets
Metalworking Alphabet Stamp Set
Ribbon or String
Scissors or (a metal rotary cutter)
Glue gun
Geometric templates (see links below)
How to make:
The first step in this process is to find a geometric shape or variations of, that you like. There are quite a few free printable templates online which you can find on Pinterest (here), or we also like Minieco's found here, and a diamond shaped one (shown in this how-to) found here. The diamond shaped one is a great one to start working with until you get used to creating these. We suggest making a few on paper too before you transfer to using your metal sheets.
Step 1
To start, print out your template, and cut out. Trace the template onto your metal sheet using the awl instead of a pen. Using the awl, score all folding lines as well, using the ruler and going over each line in all directions till you are finished scoring each fold. Pro tip: You can reduce the size of your template to make your ornaments smaller, or increase to make them bigger if you're not happy with the size of your template. We did both.
Step 2
Cut the outline out for the shape using either a rotary cutter or scissors. We found the scissors the easiest for this.
Step 3
Fold all fold lines using the ruler to fold out each shape. Make sure to fold in the direction the shape will become once it's ready to glue together. Once all folds have been folded you are now ready to stamp in your letters.
Step 4
Collect the letters for the word you wish to spell and place them into the letter stamp provided. Making sure the letters are placed in the correct position for stamping. Reminder: All the letters and the word will look spelled backwards but will print the correct way once pressed (of course). Pro tip: Smaller words, like "JOY" or "PEACE" are easier to stamp than longer words like "FA LA LA LA LA". Plus they just fit into the spaces easier if the words are smaller.

Step 5
Make sure to place the embossing mat underneath before you press the word into the metal. This will create a better embossed word. Center the stamp in place, and press firmly down making sure to press all outside edges. Careful not to move the stamp while doing this. If the word isn't as embossed as you will like, just place the stamp over the already stamped word and press again.

Step 6
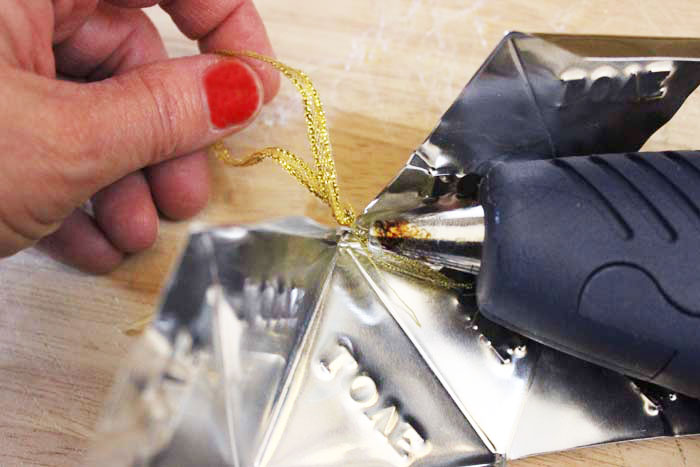
Using a glue gun, glue the ribbon into the top of the ornament. Then, glue each seam, one at a time, holding down each seam as you go to ensure it is secure as you put the ornament together. Each seam should only take a few moments to seal.
Step 7
Let dry.


Comments
check out my blog: http://bception.blogspot.ae/