Guest DIY post by Heather Lins of Heather Lins Home

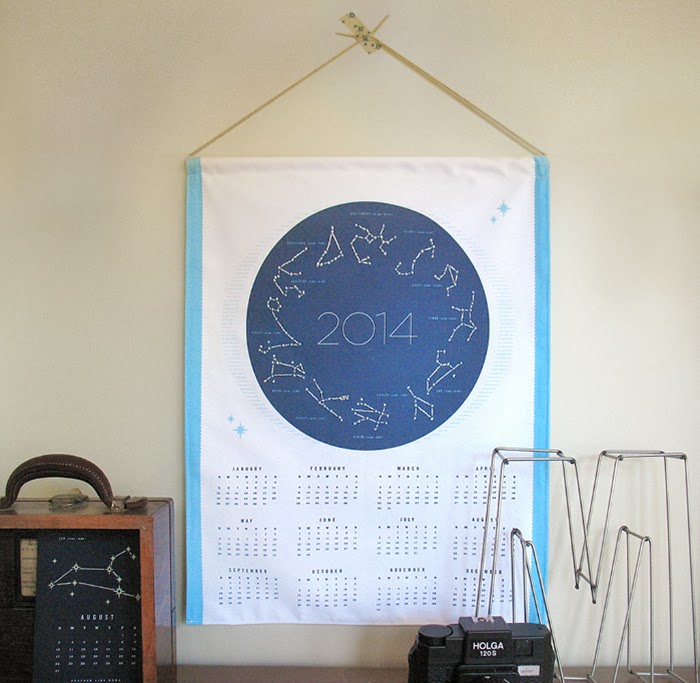
Tea towel calendars were a staple in so many of our grandmothers’ kitchens. They are also are a great way to display DIY handiwork throughout the year. Last year, I created a paper calendar kit based on the zodiac using glow-in-the-dark embroidery floss. For 2014, I also wanted to create a large-format calendar from cloth, a tea towel calendar like the ones I remember. I used Spoonflower.com, a website where (as many of you know) you can design your own fabric and share it with others. There are lots of fabric options but I chose the linen/cotton canvas. A tea towel fits on a fat quarter. With two simple embroidery stitches and some easy sewing techniques, you can create a Stitch the Stars Tea Towel Calendar for your wall. And yes, there’s more glow-in-the-dark embroidery floss. (I just can’t leave it alone!)

Stitch the Stars Tea Towel Calendar Embroidery Tutorial
What you need:
• 2014 Stitch the Stars Calendar Tea Towel (Linen/cotton canvas suggested).
• iron and ironing board
• embroidery needle
• embroidery hoop
• 1 skein DMC glow-in-the-dark embroidery floss
1) Iron the tea towel. Stretch tea towel over embroidery hoop and center the constellation of your choice in the hoop.
2) Cut a 24” piece of floss. DMC glow-in-the-dark embroidery floss is 6-ply. Divide it into two strands of three. Thread needle. Leave a tail and knot one end.
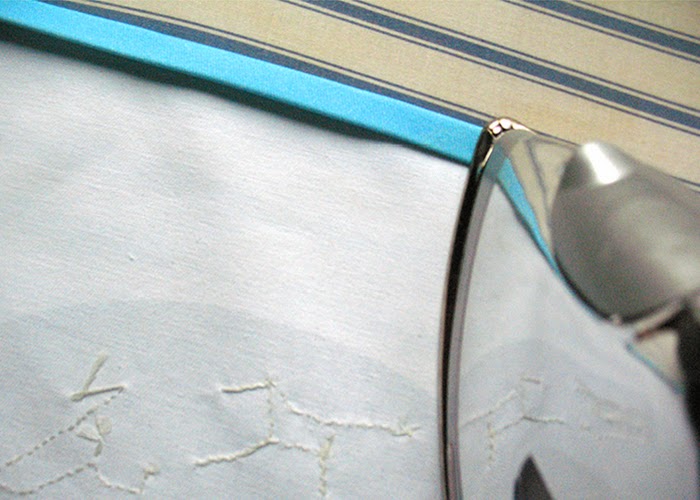
3) For each constellation, alternate between French knots and outline stitch as necessary. Stitch the stars with French knots. Use outline stitch for the dotted lines denoting constellations. End each constellation by pulling the needle through to the back of the fabric and running your needle under two or three stitches. This will anchor the thread. Trim your thread.
4) Rehoop the tea towel as necessary. Be careful not to disrupt your embroidery when re-hooping.


French Knot How-to
1) With your non-dominant hand, circle the thread around the needle three times from the needle’s eye down the shaft. (French knots can be made by wrapping the needle once, twice or three times. For this project, I found three times works best.)
2) Keep tension on the thread with your non-dominant hand. Insert the needle just to the side of where your thread first emerged and pull the needle through to the back.


Outline Stitch How-to
1) Make a small loop with your thread. Keep the loop above the line you are stitching.
2) For the next stitch, pull your needle through the fabric halfway between the entry and exit points of the first stitch. Pull the thread taut and your first stitch will lie flat.
3) Make another stitch the same length as the first. Repeat steps 1 and 2. Remember to keep the loop above your entry and exit points.

Stitch the Stars Tea Towel Calendar Wall Hanging Tutorial
What You'll Need:
• 2014 Stitch the Stars Calendar Tea Towel These instructions and measurements are for linen/cotton canvas fat quarter.
• iron and ironing board
• .5 yard 44” wide muslin for lining (optional)
• fabric scissors or rotary cutter and self-healing cutting mat
• ruler
• sewing machine
• pins
• wooden dowel (.25” diameter)
• hemp twine
• tape

1) Iron the tea towel. Trim sides and bottom of tea towel using the printed artwork as guide. It should be 18” wide. Measure from the bottom 22.75” and trim. This results in a final size of 18” x 22.75” and allows for a 1” casing for the wooden dowel.
2) On the wrong side of the fabric, fold over the sides and bottom edge over .375” and press with iron. Fold over .375” again and press.
3) Cut muslin to 16.375” x 21.75”. Insert muslin under folds to create a lining. Unfold corners and cut a 45-degree angle to remove excess fabric. Refold. Pin seams in place on three sides. Leave top of the calendar open. With your sewing machine, sew a straight stitch on the right side of fabric 1/8” from the edge on sides and bottom. Remove pins.


4) On the wrong side, fold a 1” casing at top. Press and pin in place. Sew a straight stitch .875” from the top on the right side of project to create a casing.

5) Cut a length of twine and tape it to the end of the dowel. Thread both through the casing. Unfasten the tape and throw away. Tie your twine, trim and hang.

6) Enjoy your glow-in-the-dark zodiac tea towel calendar. The constellations will glow gently after you turn out the lights! As a unique gift, gather the supplies and give to a friend as a craft kit.

Visit Heather Lins online at Heather Lins Home and at Poppytalk Handmade this month here. See a few samples of her beautiful products below.

Tea towel calendars were a staple in so many of our grandmothers’ kitchens. They are also are a great way to display DIY handiwork throughout the year. Last year, I created a paper calendar kit based on the zodiac using glow-in-the-dark embroidery floss. For 2014, I also wanted to create a large-format calendar from cloth, a tea towel calendar like the ones I remember. I used Spoonflower.com, a website where (as many of you know) you can design your own fabric and share it with others. There are lots of fabric options but I chose the linen/cotton canvas. A tea towel fits on a fat quarter. With two simple embroidery stitches and some easy sewing techniques, you can create a Stitch the Stars Tea Towel Calendar for your wall. And yes, there’s more glow-in-the-dark embroidery floss. (I just can’t leave it alone!)
Stitch the Stars Tea Towel Calendar Embroidery Tutorial
What you need:
• 2014 Stitch the Stars Calendar Tea Towel (Linen/cotton canvas suggested).
• iron and ironing board
• embroidery needle
• embroidery hoop
• 1 skein DMC glow-in-the-dark embroidery floss
1) Iron the tea towel. Stretch tea towel over embroidery hoop and center the constellation of your choice in the hoop.
2) Cut a 24” piece of floss. DMC glow-in-the-dark embroidery floss is 6-ply. Divide it into two strands of three. Thread needle. Leave a tail and knot one end.
3) For each constellation, alternate between French knots and outline stitch as necessary. Stitch the stars with French knots. Use outline stitch for the dotted lines denoting constellations. End each constellation by pulling the needle through to the back of the fabric and running your needle under two or three stitches. This will anchor the thread. Trim your thread.
4) Rehoop the tea towel as necessary. Be careful not to disrupt your embroidery when re-hooping.
French Knot How-to
1) With your non-dominant hand, circle the thread around the needle three times from the needle’s eye down the shaft. (French knots can be made by wrapping the needle once, twice or three times. For this project, I found three times works best.)
2) Keep tension on the thread with your non-dominant hand. Insert the needle just to the side of where your thread first emerged and pull the needle through to the back.
Outline Stitch How-to
1) Make a small loop with your thread. Keep the loop above the line you are stitching.
2) For the next stitch, pull your needle through the fabric halfway between the entry and exit points of the first stitch. Pull the thread taut and your first stitch will lie flat.
3) Make another stitch the same length as the first. Repeat steps 1 and 2. Remember to keep the loop above your entry and exit points.
Stitch the Stars Tea Towel Calendar Wall Hanging Tutorial
What You'll Need:
• 2014 Stitch the Stars Calendar Tea Towel These instructions and measurements are for linen/cotton canvas fat quarter.
• iron and ironing board
• .5 yard 44” wide muslin for lining (optional)
• fabric scissors or rotary cutter and self-healing cutting mat
• ruler
• sewing machine
• pins
• wooden dowel (.25” diameter)
• hemp twine
• tape
1) Iron the tea towel. Trim sides and bottom of tea towel using the printed artwork as guide. It should be 18” wide. Measure from the bottom 22.75” and trim. This results in a final size of 18” x 22.75” and allows for a 1” casing for the wooden dowel.
2) On the wrong side of the fabric, fold over the sides and bottom edge over .375” and press with iron. Fold over .375” again and press.
3) Cut muslin to 16.375” x 21.75”. Insert muslin under folds to create a lining. Unfold corners and cut a 45-degree angle to remove excess fabric. Refold. Pin seams in place on three sides. Leave top of the calendar open. With your sewing machine, sew a straight stitch on the right side of fabric 1/8” from the edge on sides and bottom. Remove pins.
4) On the wrong side, fold a 1” casing at top. Press and pin in place. Sew a straight stitch .875” from the top on the right side of project to create a casing.
5) Cut a length of twine and tape it to the end of the dowel. Thread both through the casing. Unfasten the tape and throw away. Tie your twine, trim and hang.
6) Enjoy your glow-in-the-dark zodiac tea towel calendar. The constellations will glow gently after you turn out the lights! As a unique gift, gather the supplies and give to a friend as a craft kit.
Visit Heather Lins online at Heather Lins Home and at Poppytalk Handmade this month here. See a few samples of her beautiful products below.
Comments
Claire xx
http://somewhereyonder.blogspot.co.uk