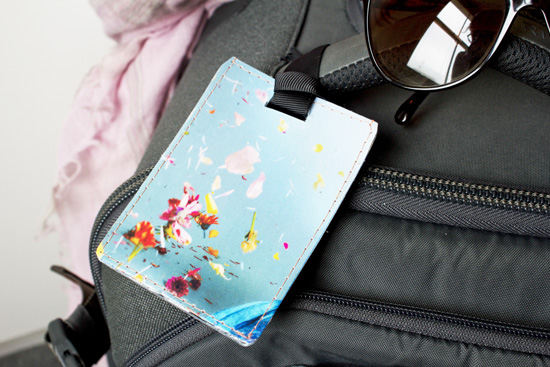
Last month I dressed up my window and today I'm dressing up my luggage with a re-purposed travel tag. Will you be packing up to go somewhere this summer? If so, or if someone you know has been bitten by the travel bug, then this personalized ID tag could be a fun way to spot your bag in an instant and never have to deal with filling out those flimsy paper tags at the check-in counter again.

I somehow ended up with a collection of free plastic travel card holders while living in London but instead of tossing them, I figured that I'd put the plastic sleeves to use as new and improved travel accessories!
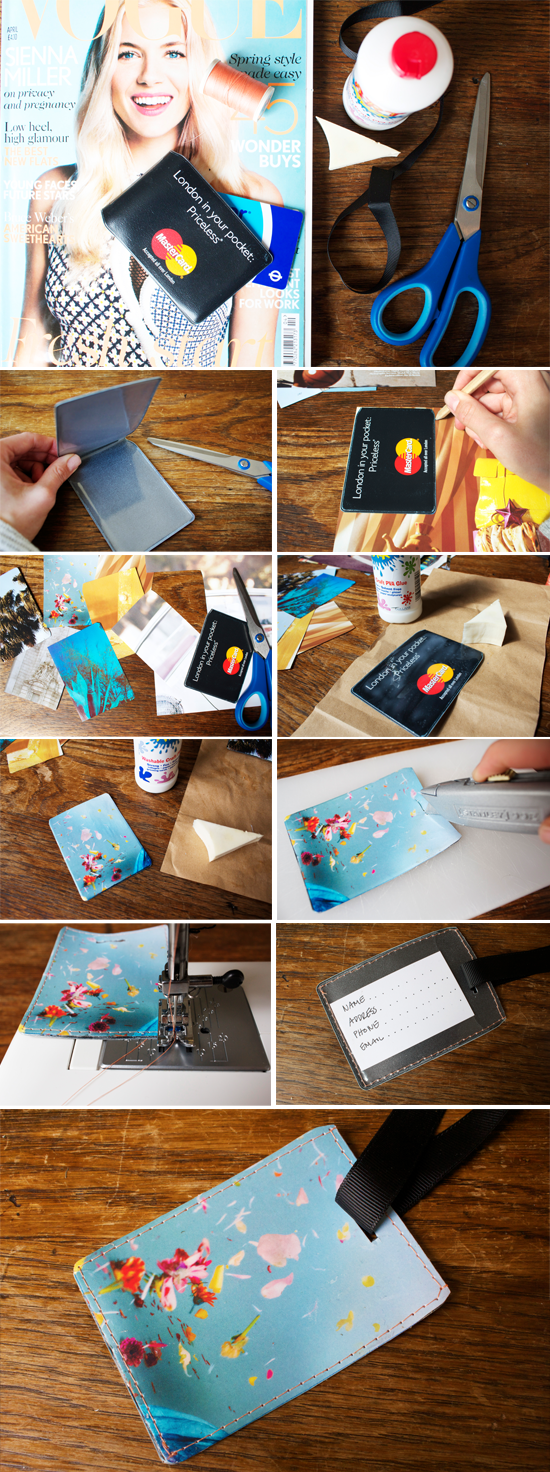
If you don't have a travel card holder like the one pictured below, dig around for old conference badges (you know, the kind you wear around your neck or clip onto your shirt) or even old wallet photo inserts. Basically, anything that has a clear plastic sleeve with the ability to glue paper on the back side will most likely do the trick.
Here's how I did it (and yes, that's a cosmetic sponge - works great with paper mache glue!) :
Step by step:
- cut card holder in half, you will only use one side
- trace the shape of the card holder onto the magazine image of choice then cut out
- spread a thin layer of paper mache glue onto card or paper
- set paper onto card and gently remove any pockets of bubbles
- apply 5 or so layers of glue, wait for each layer to dry before re-applying (this is the slowest part of the project - I did emails and chores in between)
- once the card is completely dry and thick to your liking, cut a slit for your ribbon or string
- finish by stitching slowly around the tag using a thick needle (I used a size 16). this is optional but it will secure the edges better and make the tag more durable in the long run. Be sure to stitch closely to the edge otherwise the tension may snap the paper from the plastic.
- loop your ribbon or string through the slit then insert your info card into the sleeve and you're ready to go!
I love this DIY as a gift idea for travelers, favors for a bon voyage party, or as a family project leading up to the summer holidays. If you want to get really personal with the image you could print out a favorite photo or custom graphic design instead of cutting something out of a magazine - just think of the possibilities! Whatever you choose, you can bet that your bag will stand out above the rest and be ready for any adventure that may come.
Happy Travels!
***
An LA native living in London, Ana Maria is a flea market fanatic with a knack (and love) for DIY. She shares her vintage finds in her online shop, The Pond Market, and captures her adventures and inspirations on her personal lifestyle blog, Anamu.
Comments
It is unwise to show your home address on the outside of luggage. Anyone at the airport or on the train who sees you travelling will know that your house is empty and this is their chance to rob you at their leisure.
Your tag needs redesigning to fold over so that anyone needing the address can easily see it but that it is not exposed to ever tom dick and harry who want to know where there's an empty house.
Have thought of a simple way to overcome my security concerns.
Write your name on the side of the card that doesn't show. On the showing side write 'Please turn over for details'. In this way you can have your sweet label and your security. I have actually donethis myself with purchased labels
Security-wise: I put our P.O. Box addy and cell phone number only.
As far as I know, neither can be traced back to our physical address.
:)
I make mine differently, but for security issues, I use only my first name (in case someone shouts out) our P.O. Box Address and cell phone number.
Next time, I will omit the address entirely and only put our cell phone number. No need for the address, if someone finds it they will call the number and arrangements can be made that way.
Your blog is excellent and thank you for sharing these projects :D