
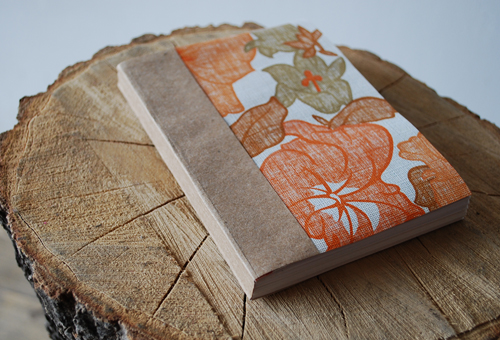
I wanted to do a project using some vintage wallpaper I had kicking around. If you like, this project is also good for recycling and reusing some other types of papers. This project is fun and fast and makes great gifts or for your own use.
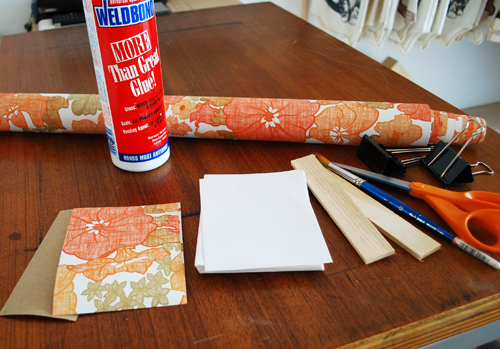
what you need:
-paper for the cover (I used wallpaper - you can experiment with different weights and thickness)
-small piece of craft paper (2.5 x 5 in.) for the spine
-recycled bond paper for the inside of the book (cut to 4 x 5 in.) approx 60 sheets
-cutting mat
-exacto knife
-two large clips
-two pieces of thin wood 1 x 6 in.
-brush
-white glue
step 1:
after your paper has been cut to size stack the papers together with the covers on the outside - place the two pieces of wood on the outside and place a clip on the top. It is important that the edge that you place glue on is very flat - any pieces of paper not on the edge will not get glued.
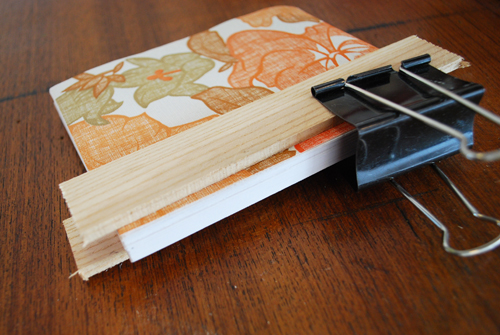
step 2:
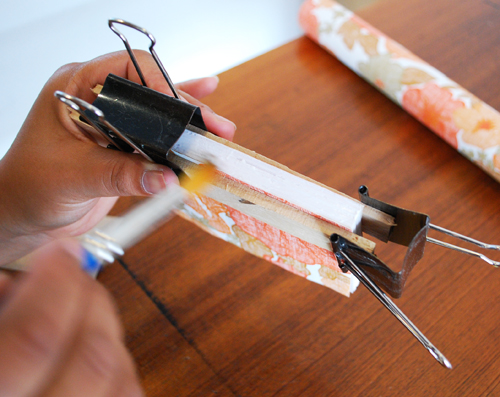
place another clip on the side and proceed to brush the glue on the edge of the book.
it's good to let it dry in between layers - I put on four layers. You can rotate the position of the clips.
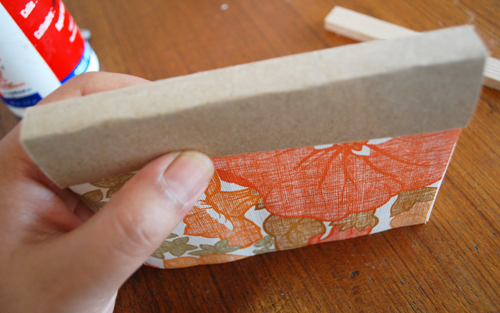
step 3
once the glue is dry (around 5-10 minutes) you can remove the clips and the wood and you can take the kraft paper and place it over the spine and position it where you want it to go - crease the edges to mark you spot.
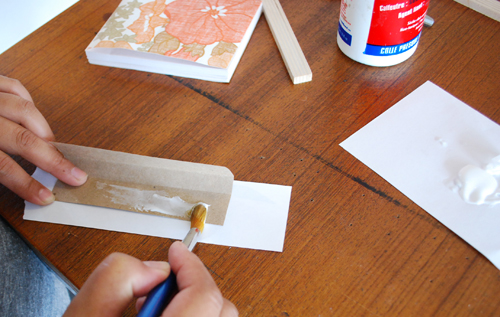
step 4
place glue on the inside of the folds of the kraft paper.
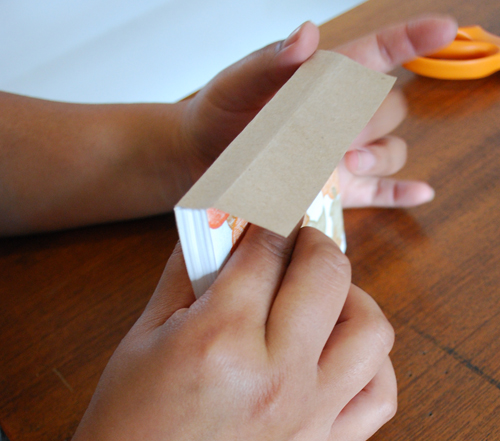
step 5
place it on the spine starting from one edge of the paper - once the kraft paper is glued to the spine - rub the entire edge with your fingers.

done - enjoy - make lots for yourself or as gifts.
By Arounna Khounnoraj of bookhou
Site: bookhou.com
Blog: bookhouathome.blogspot.com
Textiles: repeatstudio.com
23 comments:
Thanks so much for this tutorial, what a great idea, it looks lovely. Catherine x
This is a great tutorial! I love hand made books, I can't wait to have some time to make my own!!!
great tutorial, i will try to do something like that!
I've been looking for a good bookbinding tutorial to try - this is my favorite and I look forward to making one. Thank you!!
Great tutorial - thanks so much for sharing.
ok, hands down, this is the best DYI project i've seen in all the blogs i've read so far. thank you!!!
Funny, I just did this yesterday!
This is actually the first project I'm going to do with my middle schoolers this year.
That's wonderful!- you made it look very easy and doable, thank you!
GORGEOUS! I love making notebooks!! You can put in some awesome recycled paper or scrapbooking paper inbetween as well.
x
Lovely, thank you so much for sharing.
-Samya
my i-ching and all the friend to whom I read it will really appreciate that I found your awesome tutorial, thank you!!
I am becoming obsessed with little notebooks! I LOVE the cute wallpaper you used! Great project!
Beautiful! Great way to use up old scraps of wallpaper i have lying around :) Check out my blog at http://diydesignssj.blogspot.com/ for some other diy projects using recycled materials! Great idea, thanks! :)
I'll make it for sure! :) Thanks for instruction... :)
I've been working on perfecting my recycled paper, and now I know how to turn it into something awesome. Thanks so much^^
Sarah
I have an obsession with handmade notebooks and journals. I'll definitely have to give this a try!
endlesslyinspiredonline.blogspot.com
Thanks for the great tutorial! I love paper, small notebooks, and always have bits of paper of laying about!!!
I HAVE to try this! Thank you!
oh I am excited to have found your blog! going to try this soon!
so cute....great blog!!
wow it looks so great! and so easy!!! but without sewing or other, does it not fall apart?
Thanks very much for the detailed tutorials. I can't wait to create a book of my own!
flip book maker
Beautiful! I love your choice of print!
Post a Comment